

Static sites have become all the rage, and with good reason – they are blazingly fast and, with an ever growing number of supported hosting services, pretty easy to set up.
I'm not going to go into all the who, what, when, where or why of static sites here. I'm assuming that you have at least a vague idea of what they are or just want to create your own site and don't care about the other details. Either way this post is for you.
First, I want you to know I'm writing this for as broad an audience as possible; you don't need any programming knowledge to follow along, but some familiarity with the command line and Git will help out a lot.
So how can you create a static site with GitHub in 10 minutes?
We will be working with two specific tools: GitHub Pages, which is specifically designed to serve static content, and a static content generator called Jekyll.
Jekyll is a Ruby gem for creating static sites easily, so you will need to have Ruby installed on your computer if you want to use Jekyll. If you have OSX you most likely already have a version of Ruby (although you may need to update it). If you don’t, or are on a Windows computer, you can learn more about installing it here: Installing Ruby.
With that out of the way, open up a new terminal widow and type gem install bundler jekyll. This will install Bundler (a Ruby package management tool) and Jekyll.
Once those gems (Ruby packages) have installed, type Jekyll new my-static-site (name it whatever you want) which will run Jekyll's generator to create your project in a new directory. After your site is created, hop into your newly created site directory by typing cd my-static-site (or cd whatever you called you project).
Open your project in a text editor and you will see several files and folders Jekyll created for you. Right now you only need to concern yourself with the Gemfile (not Gemfile.lock). The Gemfile is a Ruby file that manages all associated Ruby packages needed to run a project.
The file will contain a line with the Jekyll version, comment it out:
#gem "jekyll", "~> 4.0.0"
Then add this line:
gem "github-pages", group: :jekyll_plugins
There can be a lot of gotchas when you install the GitHub Pages gem – sometimes the gems it depends on are out of date or the gems you have locally installed are too modern for GitHub Pages.
I have found that this can make it difficult to build and test my Jekyll site locally. It may be easiest just to test your site locally and save building it until you are ready to deploy. However, at the time of this writing you can can specify these dependency versions in your Gemfile and Jekyll will work both locally and with GitHub Pages:
gem "jekyll", "~> 3.8.5"
gem "github-pages","~> 202" , group: :jekyll_plugins
group :jekyll_plugins do
  gem "jekyll-feed", "~> 0.11.0"
end
Thanks to Alex Waibel on StackOverflow for that most recent configuration.
To see your site in action, run bundle exec Jekyll serve in your command line. This will start a server and you can see your site by typing "localhost:4000" into the URL bar of a browser.
Voila! You have created a static site with Jekyll and you are in the project directory. You are about 50% done.
Lets get this online
Go to GitHub.com and sign up, or if you already have an account, select the “new” button and create a repository. It’s important that you name your repository after the link that your GitHub Pages account will be serving, which is your_username.github.io. For example my GitHub username is tfantina and my blog is tfantina.github.io, so my GitHub repo is named: "tfantina.github.io".
Back in your terminal window, push your Jekyll site from your computer up to GitHub by running the following commands:
git init
git remote add origin git@github.com:<your_github_username>/<your_github_repo_name>.git
git commit -am “Setting up Jekyll!”
git push -u origin master
(When substituting your username and project name you don't need the opening and closing <>).
Once your changes have been pushed to your repository you should have a working static site. This is because your're using the GitHub Pages gem and named your repository in such a way that GitHub understands you want to serve it with GitHub Pages.
You can confirm this either by visiting your site or by going into the settings tab on GitHub and scrolling to the pages section. You should see a green box showing where your site has been published:
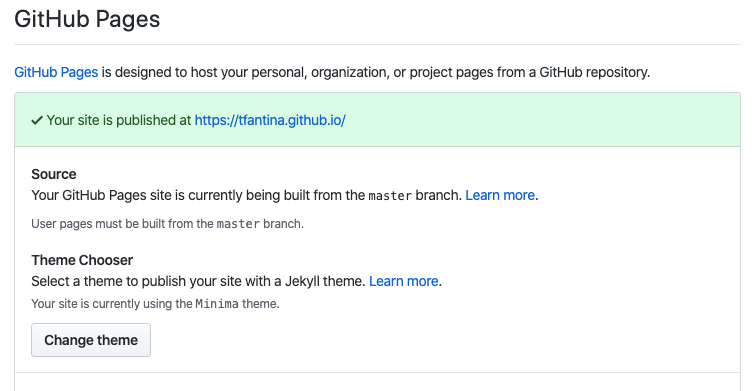
You will also note that you can easily change your theme from in here as well. GitHub provides a few default themes for Jekyll, but of course you can also make your own.
If your site says it’s published but looks blank, you may need to do a hard refresh or try looking at your site in a private window. This may seem obvious, but it gets me almost every time I set up a new Jekyll instance.
If everything went according to plan your site should look something like this:
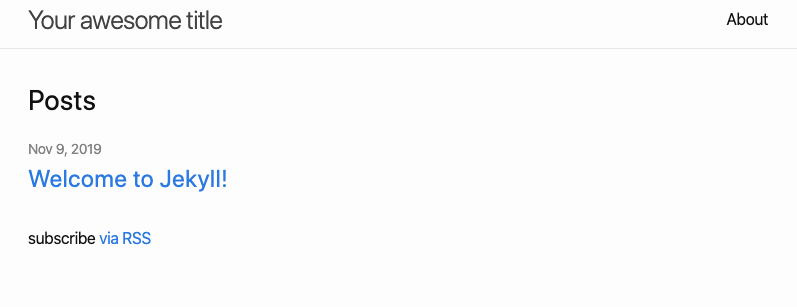
There you go – in just a few minutes you have created and deployed a static website with GitHub pages. But you probably want to be able to put some content on your page.
I promised this would only take ten minutes, so I won’t dive into all the details of pages, front matter, or the Liquid templating language. That’s a post for another day. But I will share how to create your first post.
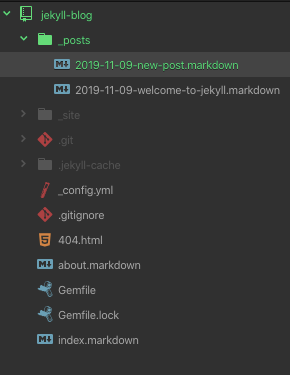
Back in your text editor, open the “_posts” folder. There is already a post welcoming you to your new blog. Create a new markdown file and save it with a name in this format: YEAR-MONTH-DAY-TITLE.markdown (see below):
A Jekyll post contains two sections: front matter, and body.
The front matter gives specific instructions to Jekyll such as what the title of the post is going to be, which layout to use, and when the post was written.
Front matter is highly customizable. For example, I wanted my posts to have hero images, so I created a lead_image tag and placed some syntax in my layout to specifically check for lead images in each post’s front matter. The Liquid templating language makes it easy to pull content from front matter into your theme.
There's a lot more you can do with front matter, but let's start off with a generic example.
The default front matter looks like this:
—
layout: post
title:  "Welcome to Jekyll!"
date:   2019-11-09 18:07:11 -0600
categories: jekyll update
—
- Layout tells Jekyll which layout you want the content to be shown on. You can have multiple layouts for different pages or post types.
- The post title
- The post date
- Categories, which are essentially tags. You can add as few or as many as you want separated by spaces.
After the front matter your post can be written in Markdown, which gives you lots of flexibility in writing your post content.
Once your post is finished save it and open up your terminal window.
git commit -am “Publishes first post
git push
After a minute (and maybe a refresh), you will be able to see your post.
Hopefully, you now have a working static site on GitHub Pages created with Jekyll! If you have any problems or questions please tweet @tfantina, or you can shoot me an email at contact@travisfantina.com.